Recording your screen
In this guide I will quickly run through how to record your screen using OBS (Open Broadcaster Software). This is useful for capturing meetings in Google Meet, or just creating videos of your screen.
The first piece of software we need to install is a program called BlackHole, which allows us to capture the system audio on your mac.
Initial setup
Download and install BlackHole from the BlackHole download page.
Setting up a Multi-Output device, this is what allows you to capture the audio of your mac as well as hear it through your speakers.
- Open the “Audio MIDI Setup” utility
- Click the Plus (+) button in the bottom left corner and click Create Multi-Output Device
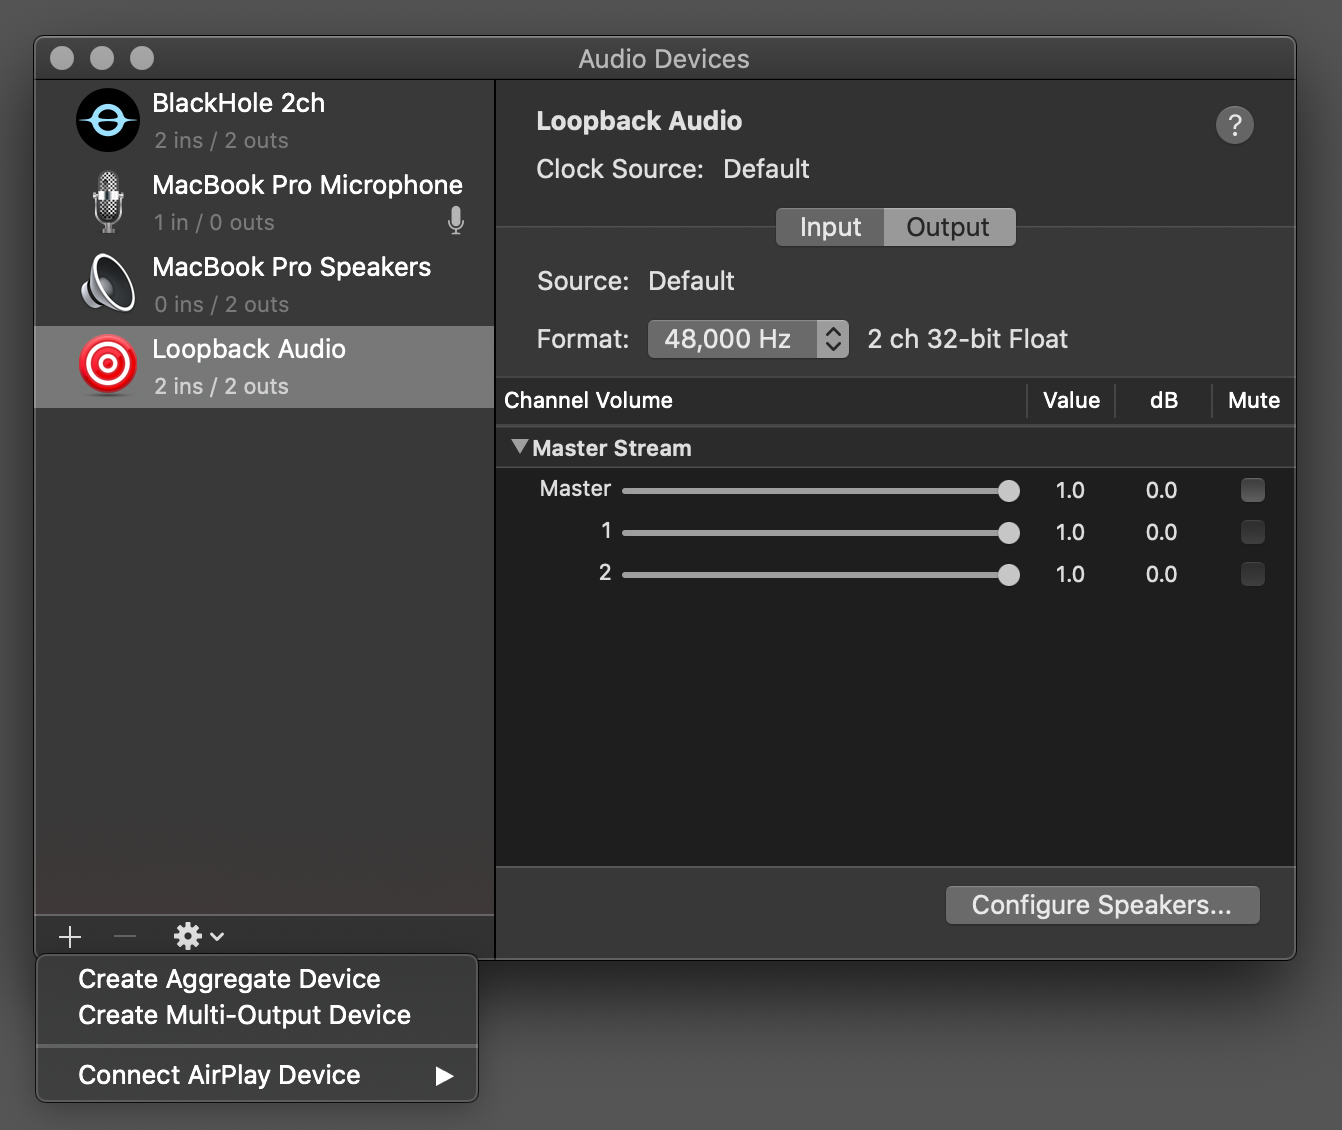
- Check the box next to “BlackHole 2ch”, and the device which you are using for your speakers (which in most cases is MacBook Pro Speakers).
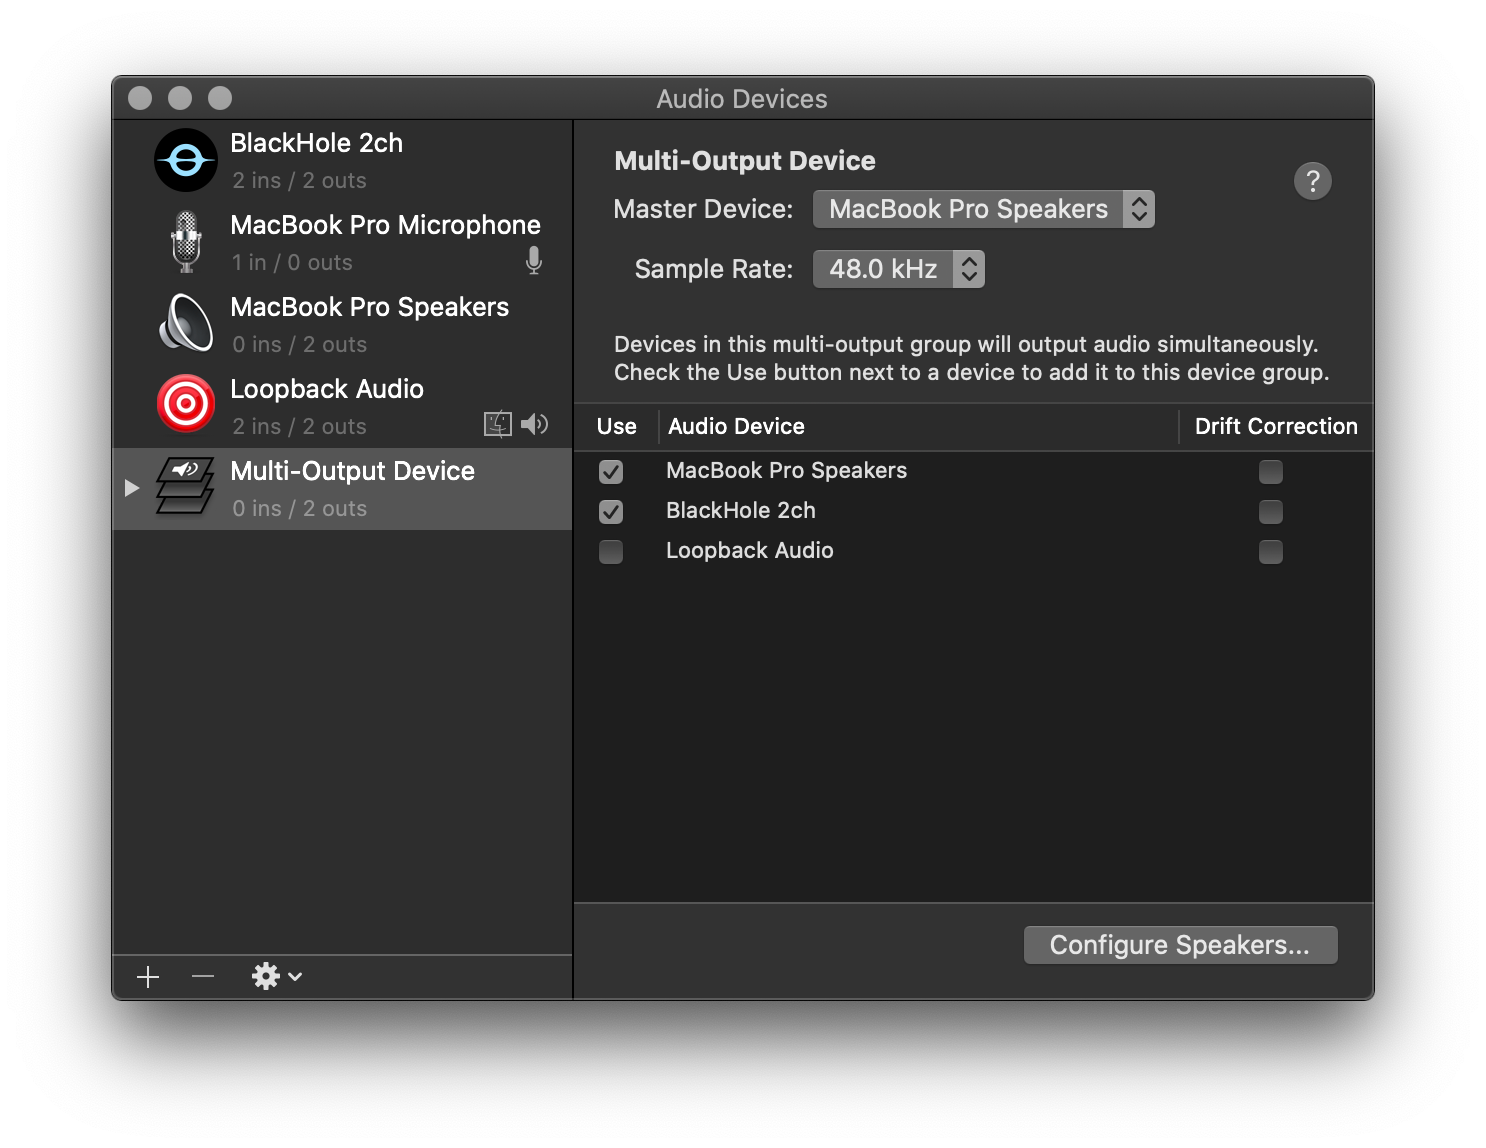
- Right-click on the Multi-Output Device and select “Use This Device For Sound Output”. Now it’s set as your default output device! All desktop audio will now be output to both your built-in device as well as the virtual BlackHole device.
The next step is to install OBS itself.
Download and install OBS from the download page.
Open OBS. At this point it will ask you to allow some macOS permissions, just make sure you grant all permissions it needs.
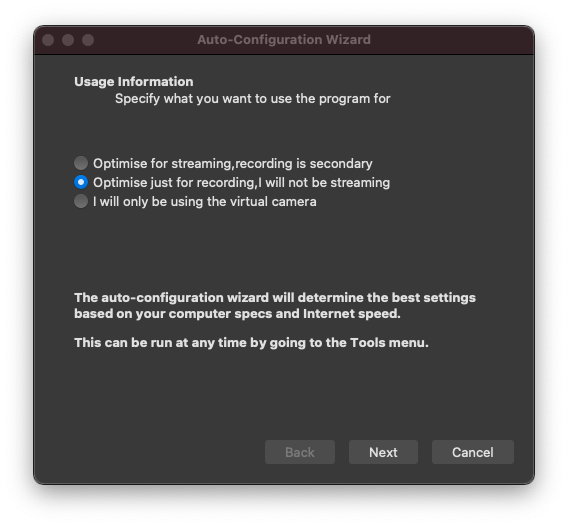
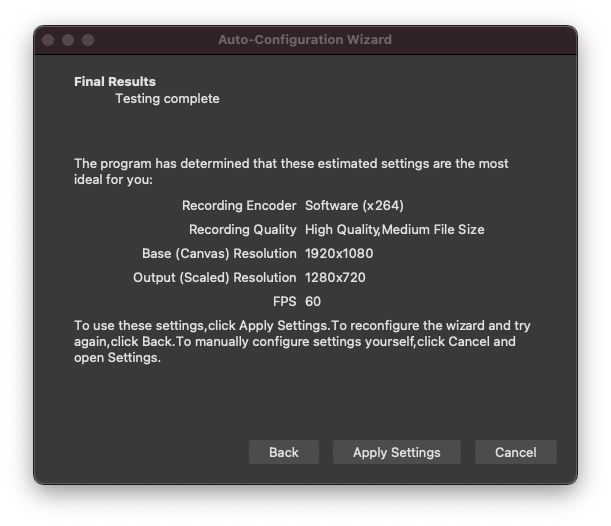
When OBS opens, you'll be greeted with the “Auto-Configuration Wizard”, assuming you've never installed OBS before. If this is the case, follow the guide first choosing “Optimise just for recording, I will not be streaming”.
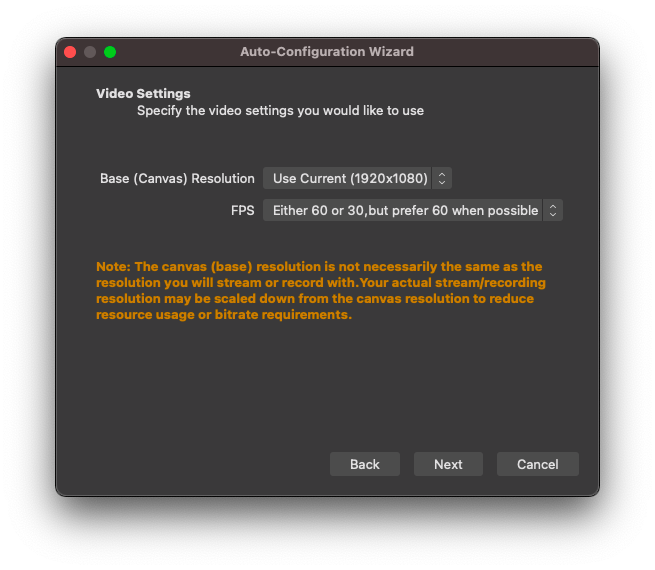
The next screen will ask for your recording resolution and frames per second, just leave these as they are.
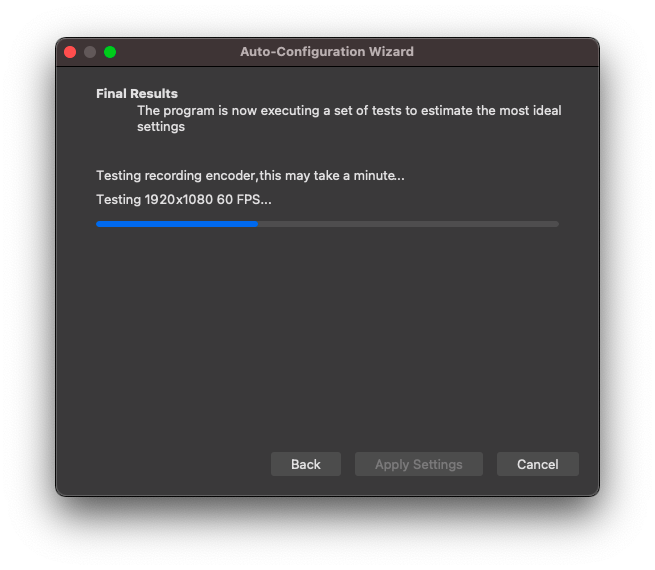
It will now run through a quick test just to make sure everything is working. Once it completes you can click “Apply Settings”.
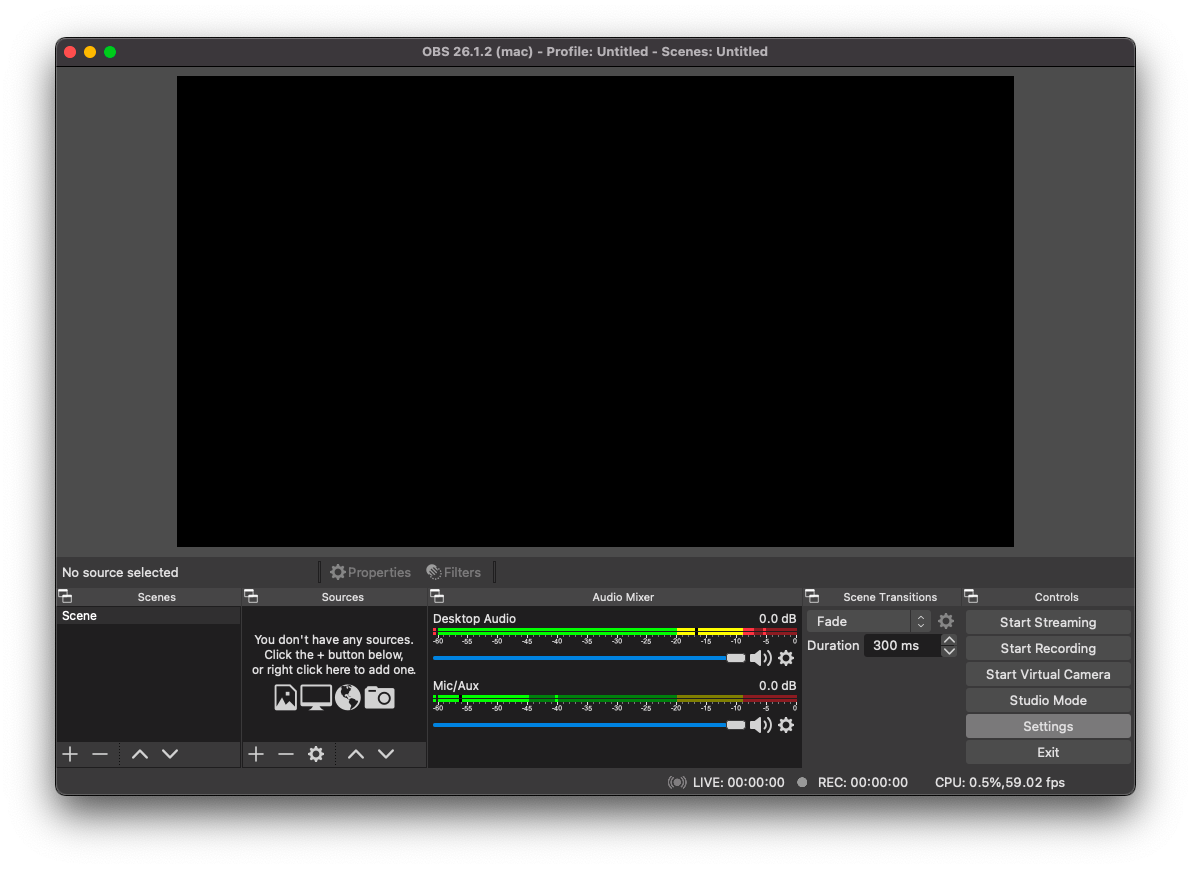
Once you click finish you will be greeted with the main screen of OBS, which should be blank.
OBS
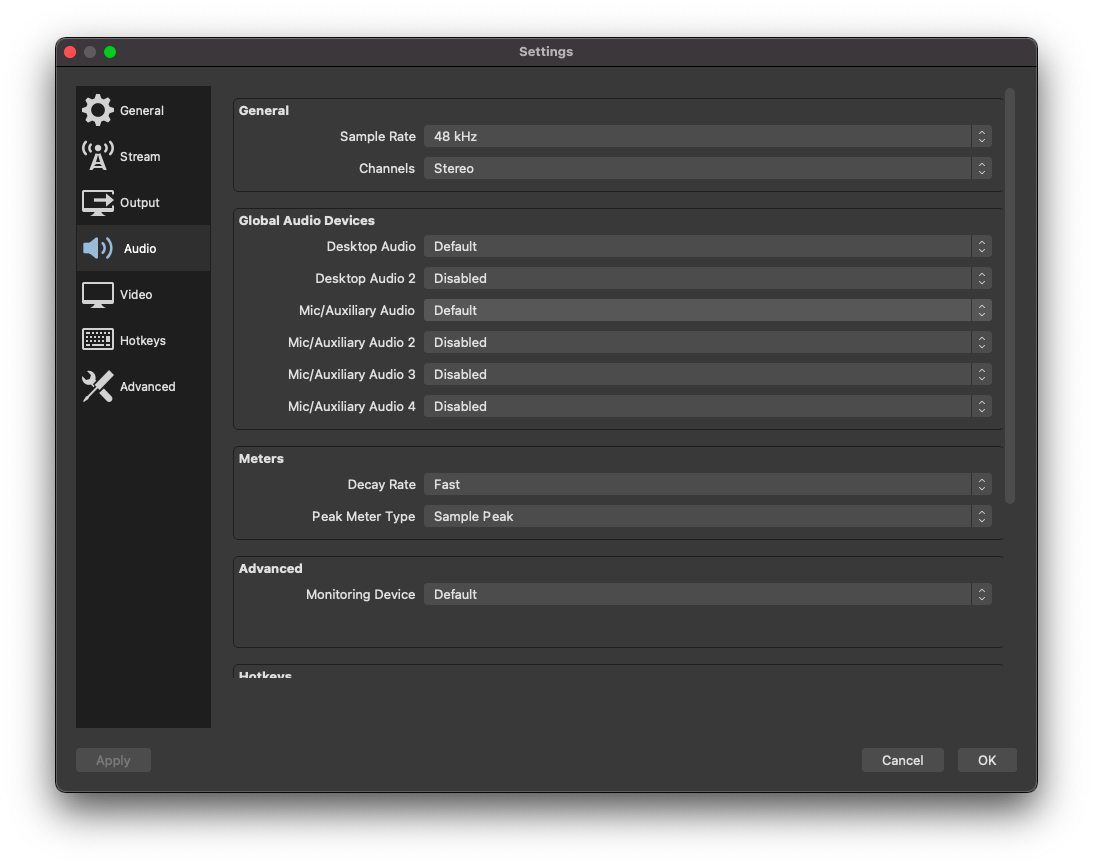
At this point, you'll want to head into the settings of OBS and ensure your Output and Audio settings are correct. In Output you need to ensure the “Recording Format” is something that is useful, .mov or .mp4 would be good choices. Also take note of the Recording Path, as this is where the recordings it creates are stored. For Audio you just need to make sure your Desktop Audio is set to default, and your Mic/Auxiliary Audio is set to your microphone. OBS will capture both the sound coming from your speakers as well as your voice through your microphone.
Output
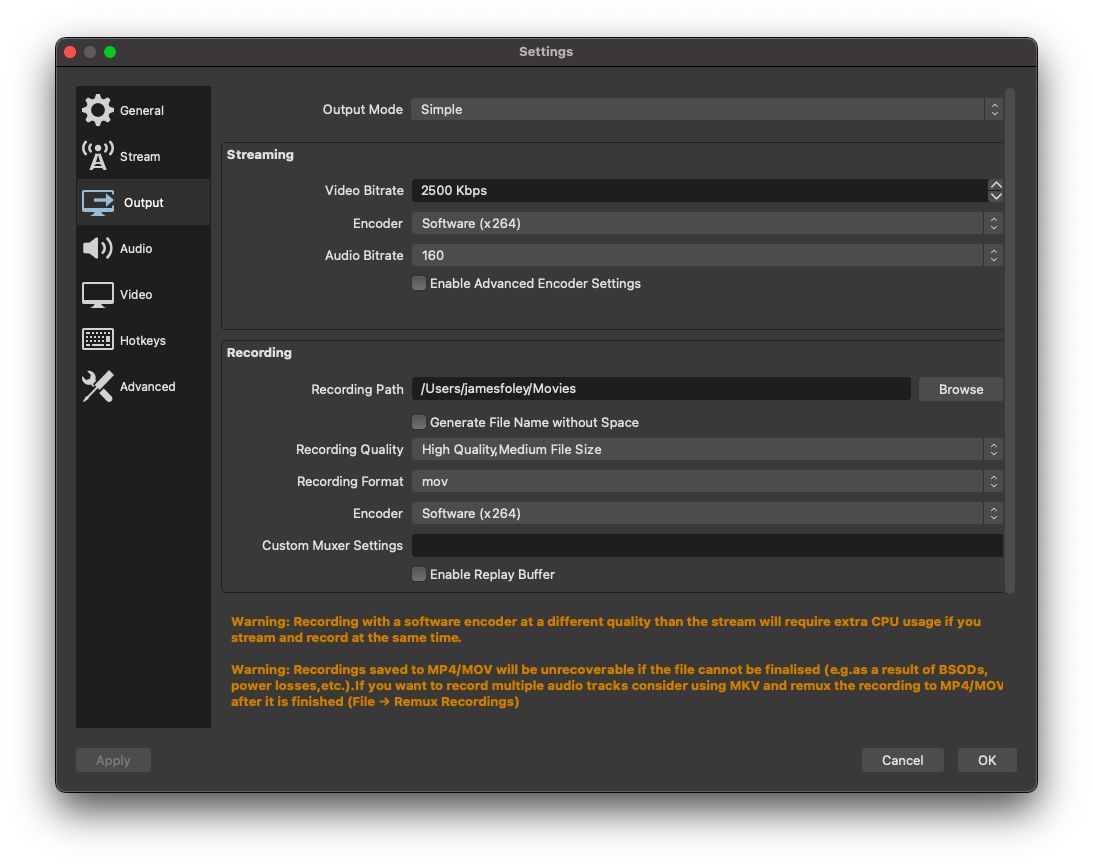
Audio
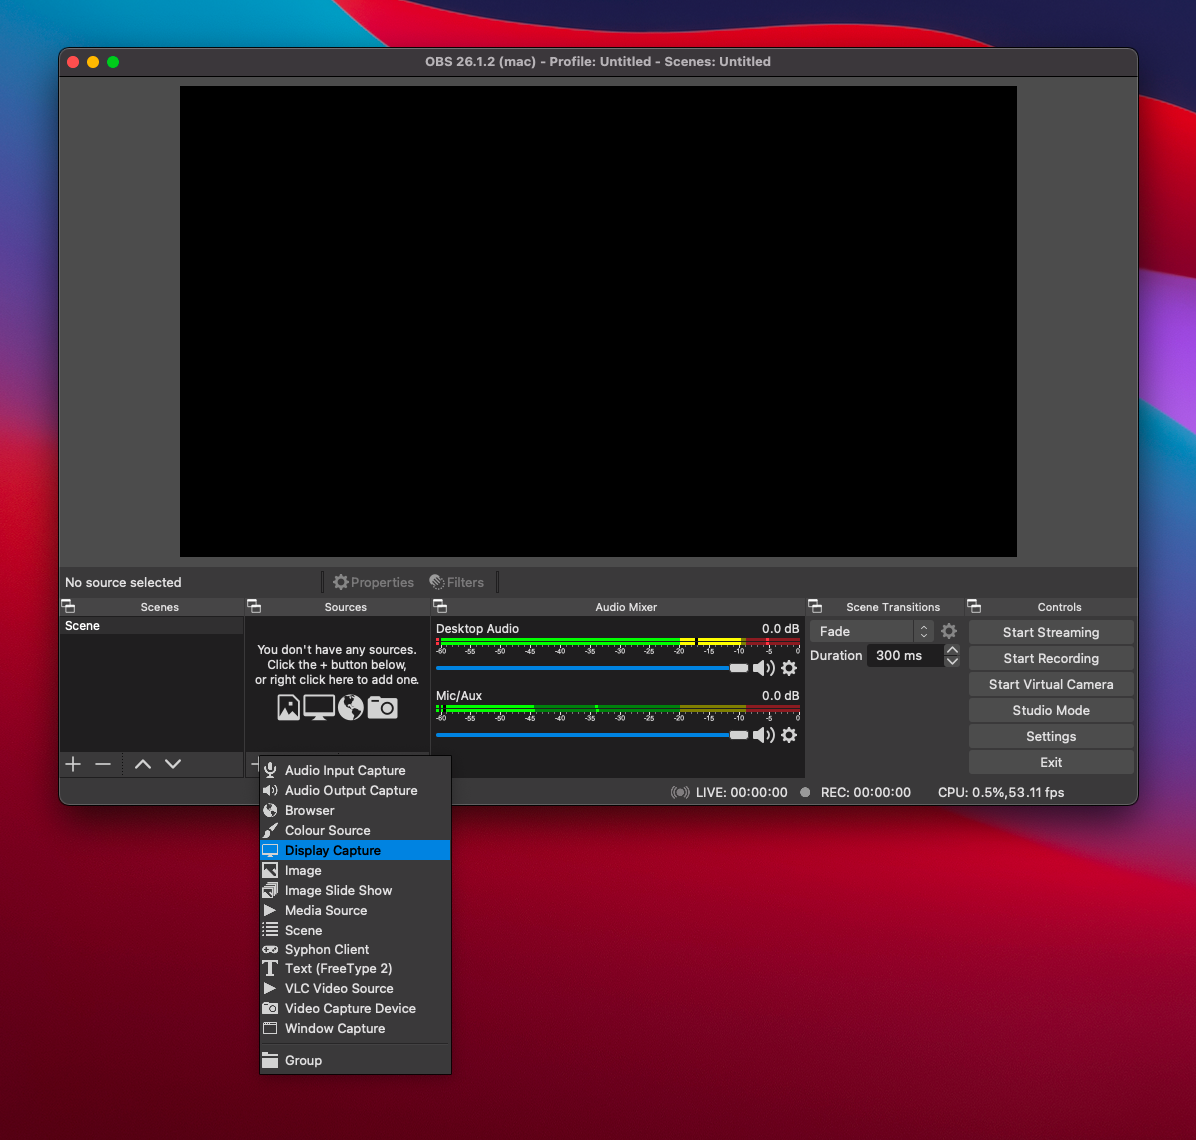
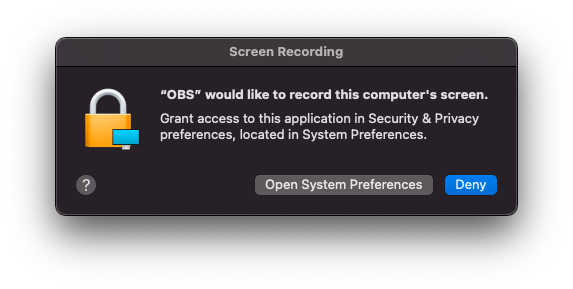
Once configured correctly, we need to add something for OBS to record. By default it is configured to record nothing, but it can be set up to record a screen, a window, a webcam, or anything basically. You also have the option to overlay text, images, videos and browser windows. In this example we are just going to record our screen. macOS will prompt you at this step to allow Screen Recording permissions for OBS, make sure you allow this otherwise nothing will work.
Click the “+” icon in the bottom of the “Sources” panel in the bottom of the main OBS window, and then select Display Capture. Call it anything you like and hit OK. You'll be greeted with the properties window of your new Display Capture Source where you can select the display you'd like to capture if you're using multiple monitors. Hit OK again and you should see your display source get added to the main canvas in the centre of OBS.
Add display capture source
Display source name

OBS Screen Recording Permission Request
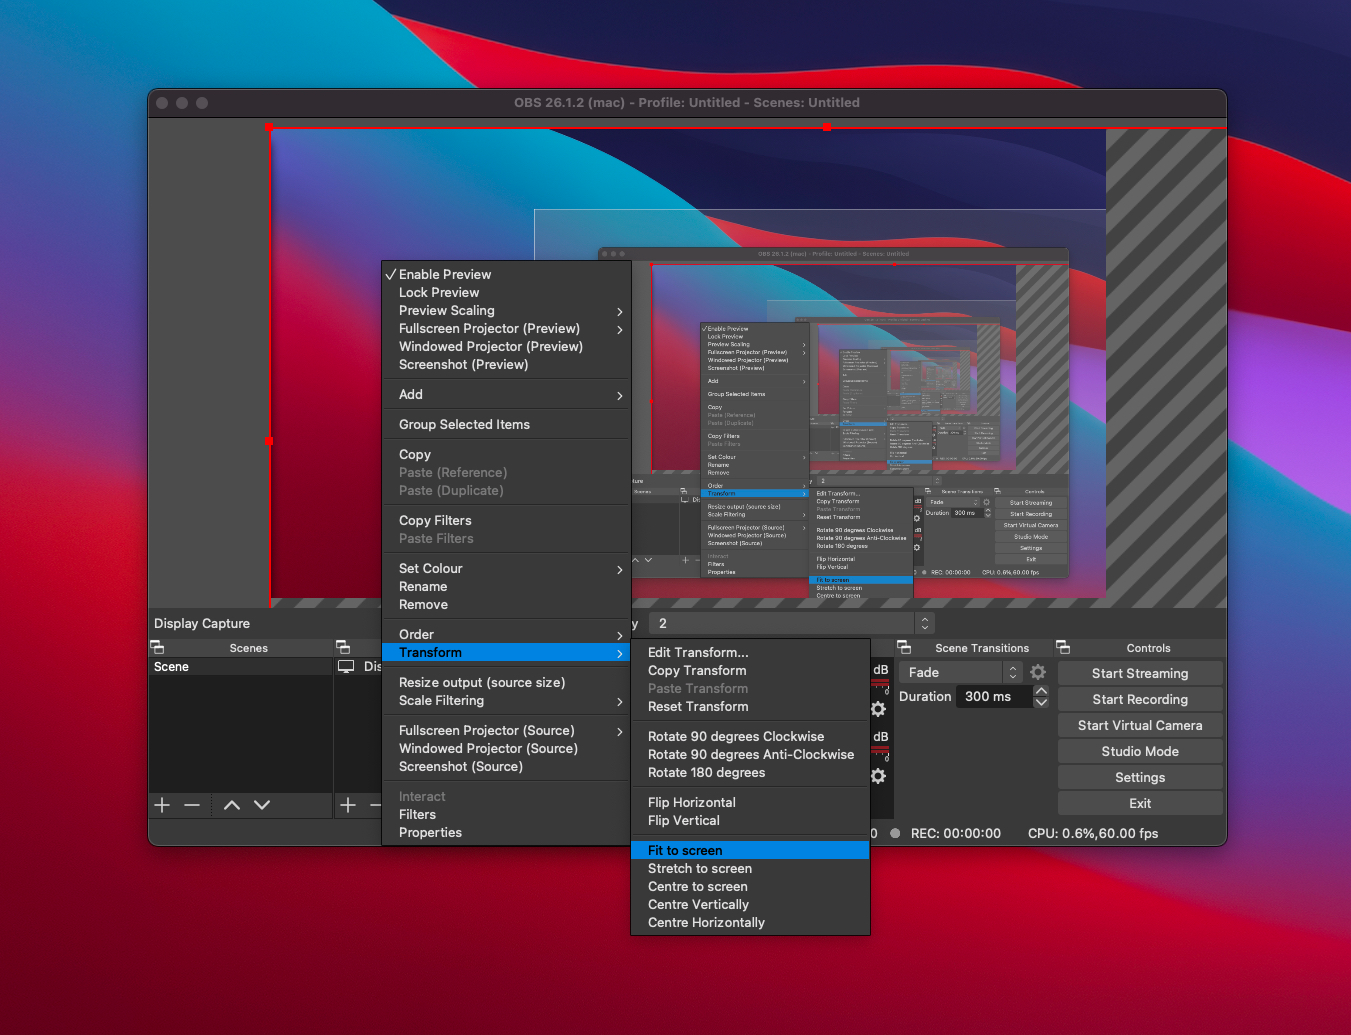
Display Capture Source With Incorrect Sizing
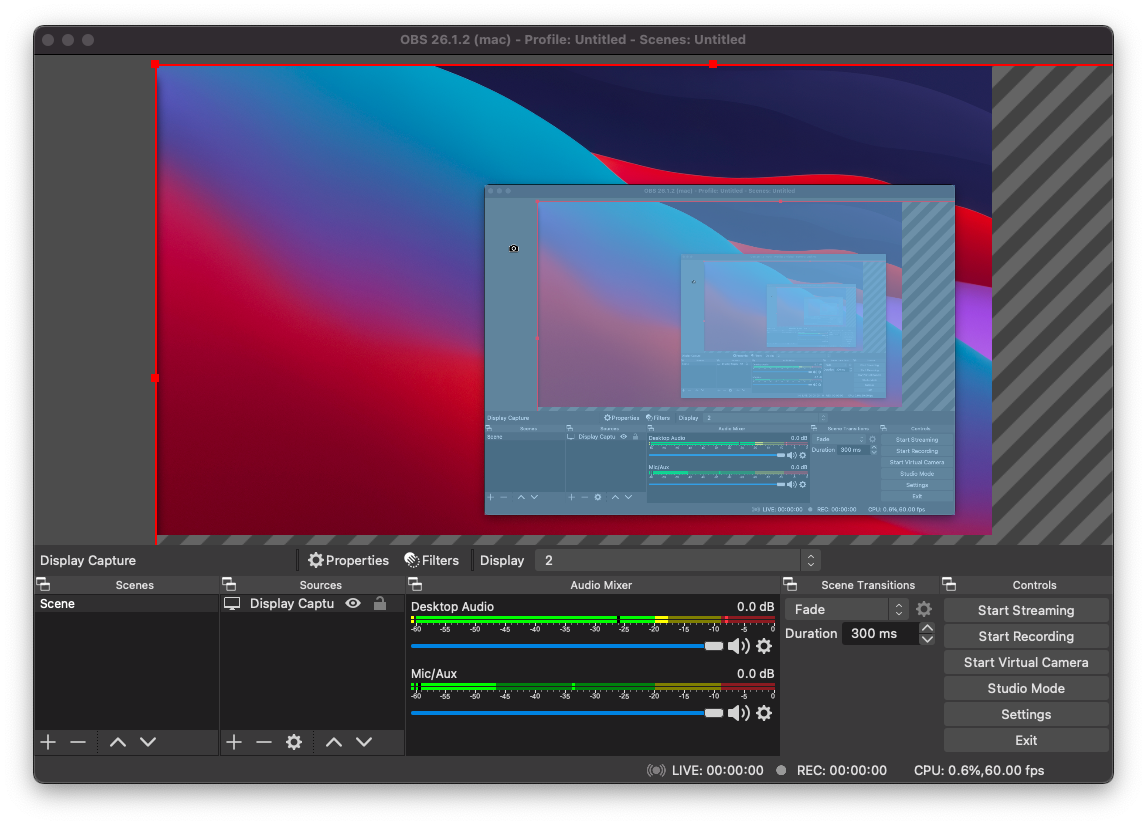
You may notice that your display doesn't quite fill the canvas like the screenshot above. To fix this, right click on the display in the canvas and click Transform → Fit to screen. This will resize your display source to fix the canvas correctly.
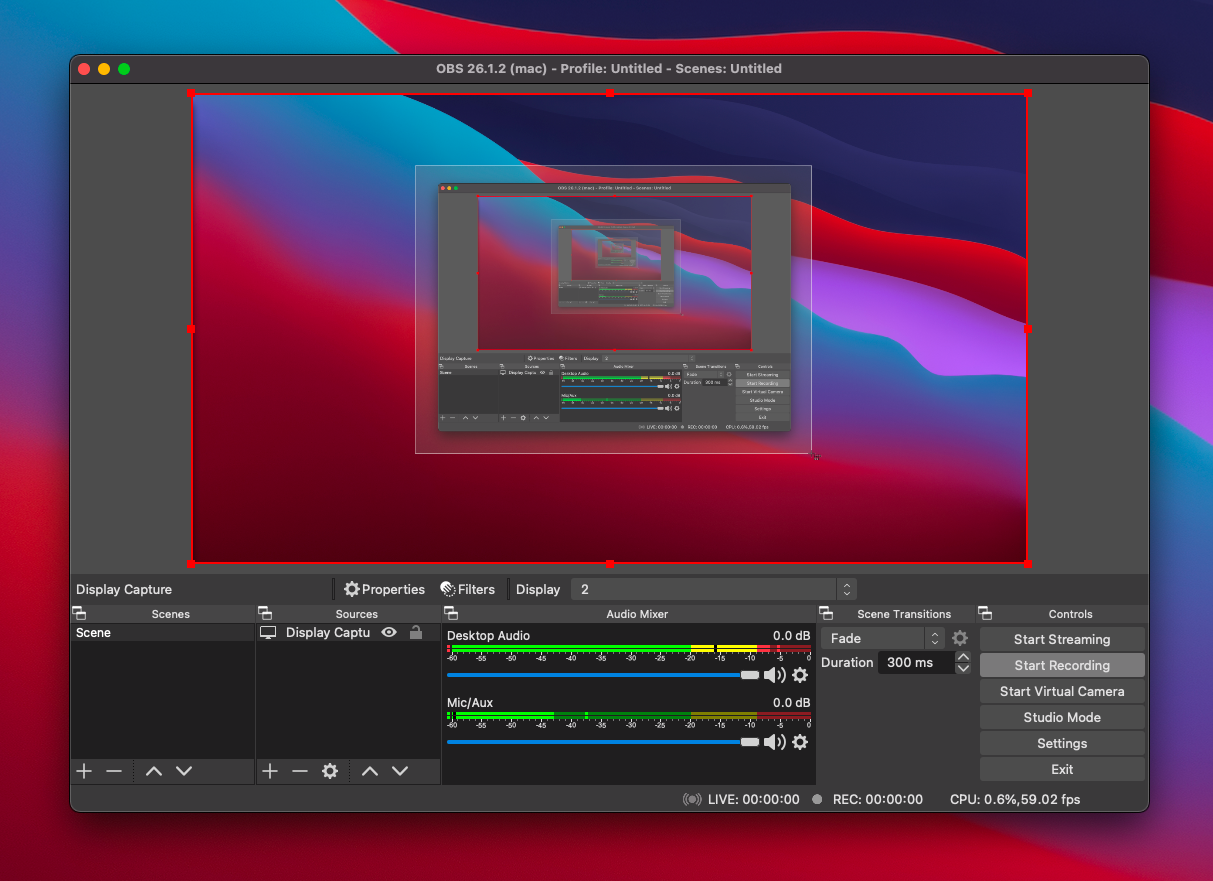
Display Capture Fit To Screen
Display Capture With Correct Sizing
From here you should just be able to hit record and everything should work as expected.